
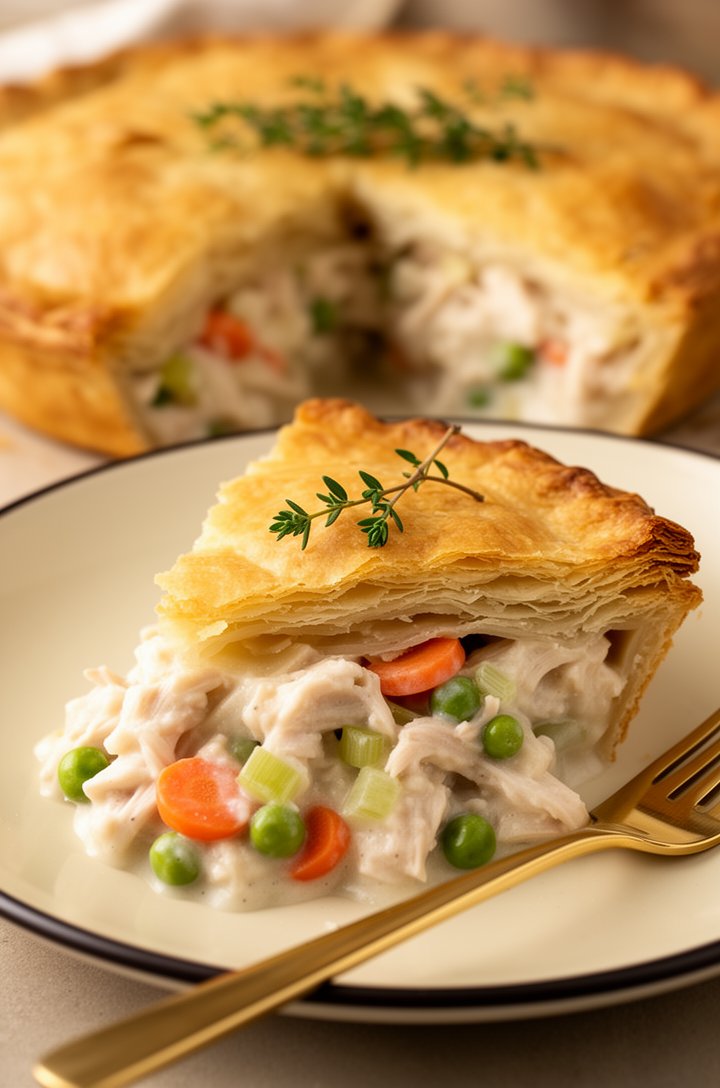
Double-Crust Chicken Pot Pie
Flaky, buttery double crust packed with tender chicken, carrots, peas, and celery in a thick thyme-scented gravy. From-scratch comfort food that earns every minute it takes.
Tasted & written by Rachel
Prep
45 min
Cook
50 min
Total
1h 35m
Serves
8
The Key
Cook the roux until it smells toasty, then add liquids slowly. The gravy needs to coat a spoon thickly before the filling goes in — if it's thin in the skillet, it'll be thin in the pie. This is the difference between a pot pie that slices clean and one that collapses into a puddle.
David's mom makes chicken pot pie from a frozen box. She's wonderful. Her pot pie is not. I spent three weekends getting this right — testing crusts, ratios of broth to half-and-half, whether to poach or roast the chicken — and the version you're looking at is the one that made David text his mother 'sorry Mom, Rachel's is better.' She has not forgiven me.
The filling is thick enough to hold its shape when you slice, but still creamy. The crust is all butter, no shortening, because life is short and flaky crust matters. The thyme isn't optional — it's the thing that makes this taste like a real pot pie instead of cream sauce in a pastry shell.
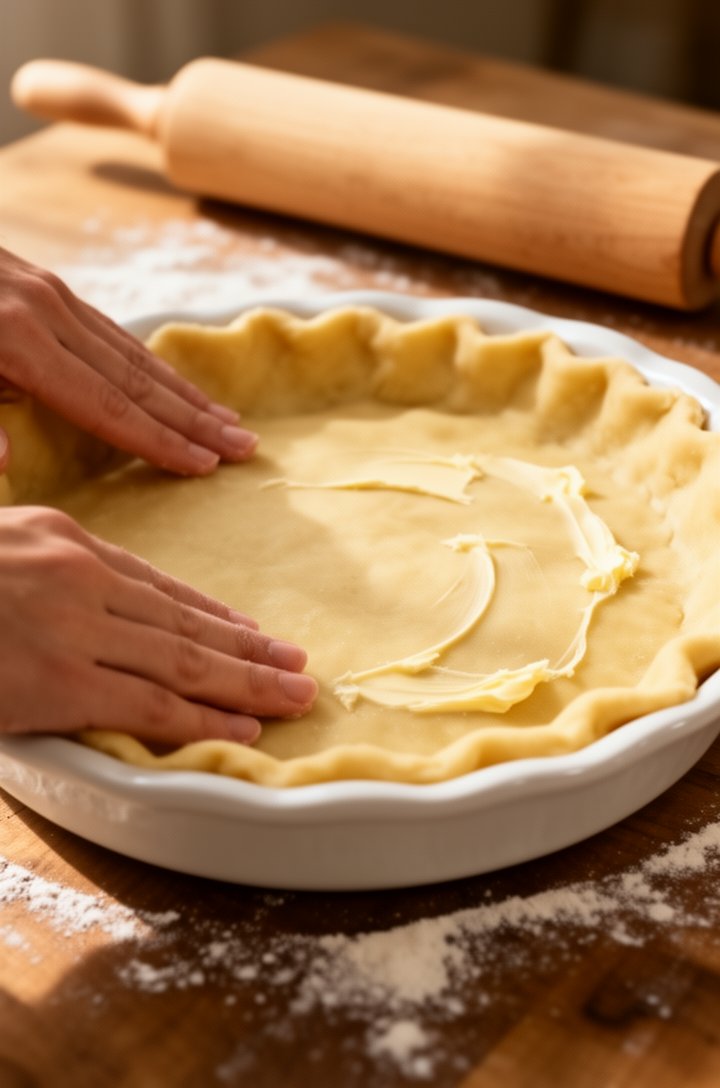
The crust goes first. I know — you want to skip it. You're thinking about store-bought. I won't judge you if you do (see the tips below), but homemade all-butter crust takes fifteen minutes of actual work, and the difference is the kind of thing people notice without being able to name.
The gravy is where you earn the flavor. A proper roux — butter, flour, time — then chicken broth and half-and-half stirred in slowly until it thickens to the point where it coats a spoon and holds. Most recipes use milk. Half-and-half is the move. It gives you a gravy that stays thick through baking instead of thinning out into sad, watery filling.
Let the filling cool. I cannot stress this enough. Hot filling in raw crust is how you get a soggy bottom and a collapsed pie. Twenty minutes of patience. Read something. Annoy David. Just don't assemble yet.
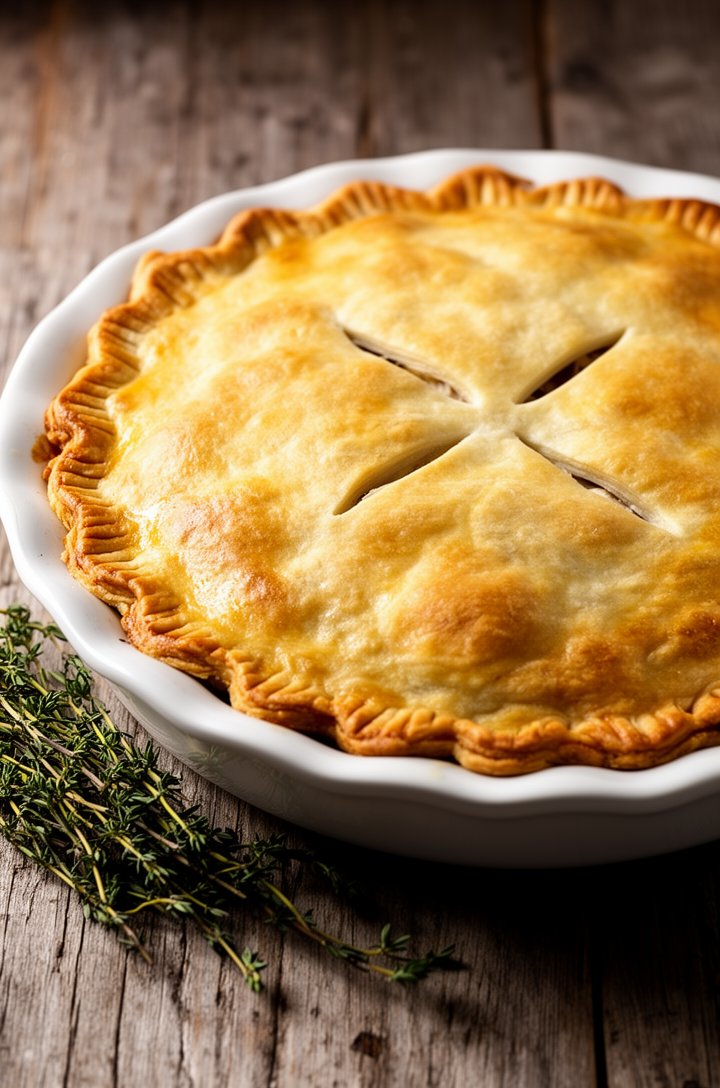
Forty minutes at 425°F and you'll know it's done by the smell before you look. Golden on top, bubbling through the vents, and the kitchen smells like the reason people buy scented candles that say 'home.' Let it rest. Fifteen minutes. The filling sets, the crust firms up, and when you cut in, it holds.
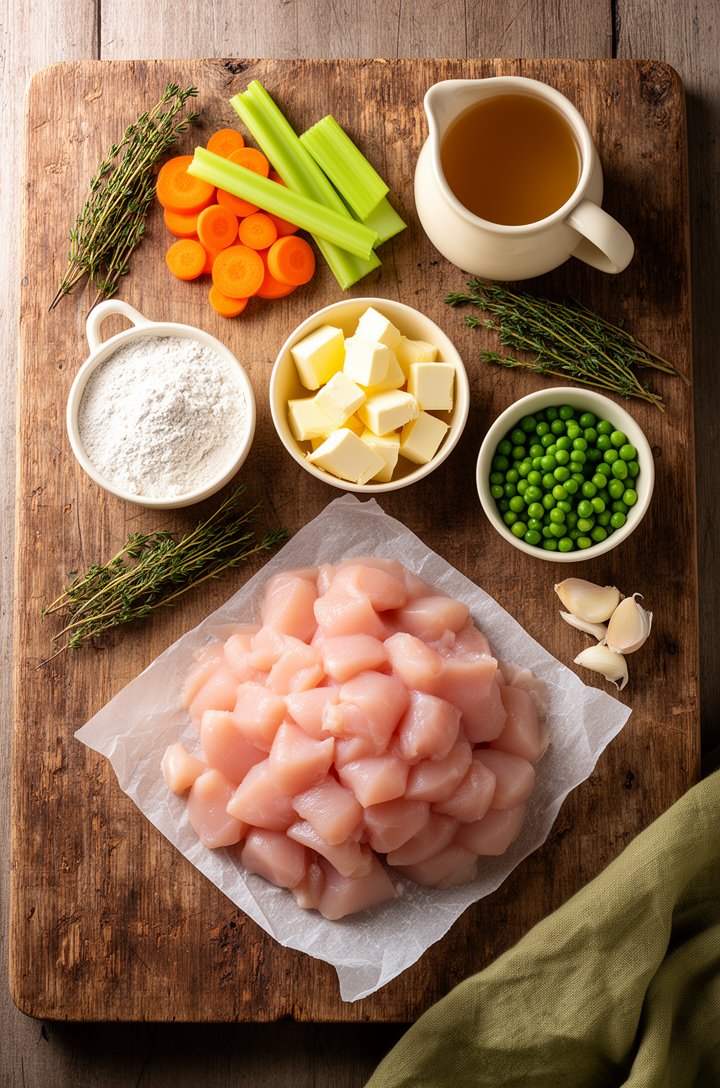
Mise en place
Ingredients
Pie Crust
- 2½ cups all-purpose flour (for pie crust)
- 1 tsp salt (for pie crust)
- 1 cup (230g) unsalted butter, cold and cubedcold, cubed
- ½ cup ice water, plus more as needed
Filling
- 1 pound boneless skinless chicken breasts or thighs, cubedcubed
- 1 cup sliced carrots (about 2 medium carrots)sliced into coins
- ½ cup sliced celerysliced
- ⅓ cup (5 Tbsp) unsalted butter
- ⅓ cup chopped yellow onionchopped
- 1 tsp minced garlicminced
- ⅓ cup all-purpose flour (for the roux)
- ¾ tsp salt
- ½ tsp freshly ground black pepper
- 1 tsp dried thyme leaves
- 1¾ cups chicken broth (reduced sodium recommended)
- ⅔ cup half-and-half
- 1 cup frozen peas
Egg Wash
- 1 large egg (for egg wash)
- 1 Tbsp milk (for egg wash)
Garnish
- A few sprigs fresh thyme for garnishOptional
The Method
Instructions
- 01
Make the pie crust. Whisk flour and salt in a large bowl. Add cold cubed butter and cut in with a pastry cutter or your fingers until the mixture resembles coarse crumbs with some pea-sized butter pieces remaining.
Done when:Mixture looks like wet sand with visible pea-sized butter chunks. Squeeze a handful — it should hold together without crumbling apart.
- 02
Drizzle in ice water 1 tablespoon at a time, mixing with a fork after each addition, until the dough just comes together. Divide into two equal discs, wrap tightly in plastic, and refrigerate at least 2 hours or overnight.
Done when:Dough holds together when pressed but isn't sticky or wet. You can still see butter streaks — that's what makes it flaky.
- 03
Combine cubed chicken, sliced carrots, and celery in a large pot. Cover with water, bring to a boil, then reduce to a simmer for 10 minutes.
Done when:Chicken is just cooked through — opaque white all the way through, no pink. Carrots should be tender but still have some bite.
- 04
Drain the pot, reserving the vegetables and chicken separately. Set aside.
Done when:Chicken and vegetables drained and separated. Discard the poaching liquid or save it — your call.
- 05
Melt butter in a large skillet over medium heat. Add chopped onion and garlic. Cook, stirring occasionally, until the onion is translucent and the butter starts to lightly brown.
Done when:Onions are soft and glassy, not brown. Butter smells nutty and is turning light gold at the edges.
- 06
Whisk in flour, salt, pepper, and dried thyme. Stir constantly for 1 minute to cook out the raw flour taste.
Done when:Paste is smooth, no dry flour visible, and it smells toasty rather than starchy.
- 07
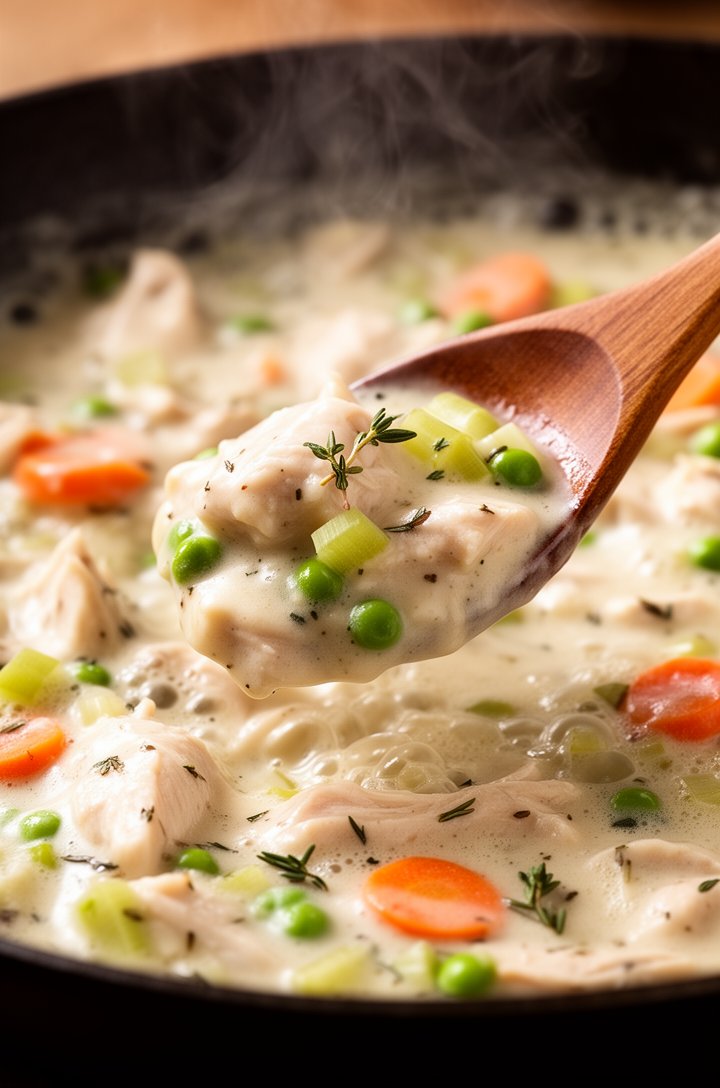
Gradually pour in chicken broth and half-and-half, whisking constantly to prevent lumps. Continue cooking and stirring until the gravy is thick and bubbly.
Done when:Gravy coats the back of a spoon thickly. Draw a line through it with your finger — it should hold the line without running back together.
- 08
Fold in cooked chicken, carrots, celery, and frozen peas. Taste and adjust salt and pepper. Remove from heat and let cool while you roll out the crust.
Done when:Filling is thick and creamy, peas are bright green, and the whole thing tastes seasoned — not bland, not salty. Slightly peppery.
- 09
Preheat oven to 425°F (218°C). Roll out one disc of chilled dough on a lightly floured surface to about 12 inches in diameter. Fit it into a 9-inch pie plate, pressing gently into the corners. Let the excess hang over the edge.
Done when:Dough is about ⅛ inch thick, fits the plate without stretching, and drapes slightly over the rim. No cracks or tears.
- 10
Spoon the cooled filling into the crust-lined pie plate, spreading it evenly. Roll out the second dough disc and drape it over the top. Trim excess dough, fold the top edge under the bottom edge, and crimp with a fork or your fingers to seal.
Done when:Edges are sealed and crimped all the way around. No gaps where filling could leak out during baking.
- 11
Cut 4-5 small slits in the top crust to vent steam. Beat the egg with 1 tablespoon milk and brush a thin, even layer over the entire top crust.
Done when:Top crust has a wet sheen from the egg wash. Slits are about 2 inches long and cut through the full thickness of the dough.
- 12
Bake for 32-40 minutes. After 20 minutes, check the crust edges — if browning too fast, shield them with strips of foil or a pie crust shield.
Done when:Top crust is deep golden brown all over, not pale in the center. Filling is visibly bubbling up through the steam vents. Internal temp reaches 165°F.
- 13
Remove from the oven and let rest for at least 15 minutes before slicing. This is not optional — the filling needs time to set or it'll run everywhere.
Done when:Filling has thickened and holds its shape when you cut in. Still warm, but not a lava flow.
Where it goes wrong
Common mistakes
- ✕Pouring hot filling into raw crust — melts the butter out of the dough and you get a soggy bottom.
- ✕Skipping the steam vents — pressure builds inside, the top crust puffs up and cracks open unevenly.
- ✕Using pre-shredded chicken without seasoning — rotisserie works, but it needs salt. Taste the filling before you assemble.
- ✕Cutting in too early — the gravy hasn't set yet and it pools across the plate like soup.
Context
Compared to the usual
This is the from-scratch double-crust version — the one your grandmother made if your grandmother was patient. The Pillsbury shortcut (store-bought crust, canned broth, frozen veggies, no roux refinement) gets you 80% of the way in half the time, and honestly, on a Tuesday, that's fine. But for a Sunday or a dinner you want to feel proud of, the homemade crust and real roux are the gap between good and genuinely great. Some versions skip the bottom crust entirely, using a biscuit or puff pastry top only — lighter, faster, but it's a different dish at that point.
Glossary
Techniques used
- Roux
- Equal parts fat and flour cooked together as a thickening base. For pot pie, cook it just past raw (blonde stage) — you want thickening power without a dark nutty flavor competing with the chicken.
- Blind baking
- Pre-baking an empty crust with weights to prevent puffing. Not needed here since the double crust bakes with the filling, but useful if you ever convert this to a top-crust-only version.
- Egg wash
- Beaten egg with a splash of milk, brushed on pastry before baking. Gives the crust its deep golden color and slight sheen. Skip it and you get a pale, matte top.
Riffs
Variations
Turkey pot pie
Swap in leftover roast turkey for the chicken. Perfect post-Thanksgiving. Add a pinch of sage to the gravy to lean into the holiday flavor.
Top-crust only
Skip the bottom crust for a lighter version. Pour filling into a baking dish, drape one rolled-out crust on top, vent, egg wash, and bake at the same temp for 25-30 minutes.
Individual pot pies
Divide filling among four ramekins. Cut crust rounds to fit. Bake 20-25 minutes at 425°F. Adorable, and everyone gets maximum crust ratio.
With biscuit topping
Replace the top crust with drop biscuits (buttermilk biscuit dough in rough dollops). More rustic, less work, and the biscuits soak up the gravy from the top.
Q & A
Frequently asked
Can I use store-bought pie crust?
Yes. Use a quality refrigerated crust (not frozen), let it come to room temperature, and you'll still get a good pot pie. Just not the same flaky layers.
Can I use chicken thighs instead of breasts?
Absolutely — thighs are more forgiving and slightly richer. Cut them the same size and poach the same way.
Can I make this ahead?
Assemble completely, cover tightly with plastic wrap, and refrigerate up to 24 hours before baking. Add 5-10 minutes to the bake time since it's starting cold.
What if I don't have half-and-half?
Mix ⅓ cup whole milk with ⅓ cup heavy cream. Or use all whole milk — the filling will be thinner but still works.
Can I add other vegetables?
Mushrooms and corn are the most popular additions. Keep the total vegetable volume about the same so the filling ratio stays right.
Storage
Cover tightly and refrigerate for up to 4 days. The filling thickens beautifully overnight — leftovers are arguably better than the first serving.
Reheating
Individual slices: 350°F oven for 15-20 minutes until the filling bubbles. Microwave works in a pinch but the crust goes soft. Whole pie: cover loosely with foil, 325°F for 25-30 minutes.
Freezing
Freeze the assembled unbaked pie tightly wrapped for up to 3 months. Bake from frozen at 425°F for 50-60 minutes, covering edges with foil after the first 25 minutes.
Make ahead
The pie crust can be made up to 3 days ahead (refrigerated) or 3 months ahead (frozen). The filling can be made the day before and stored in the fridge. Assemble and bake when ready, adding 5-10 minutes if filling is cold.
Serve with
A simple green salad with a sharp vinaigrette to cut through the richness. Cranberry sauce on the side if you're feeling Thanksgiving-adjacent. A cold glass of white wine or apple cider.